
Gingerbread men are so basic. Let’s make gingerbread narwhals instead! Narwhals are my favorite animals so it just made sense to design a gingerbread style narwhal to get into the Christmas spirit. You can add one to a tote bag to create a cute reusable gift bag. Sew one onto a blanket or hat to make it extra festive. Or use it as a present topper or gift tag.
I know that chenille yarn gets a bad wrap for being difficult to work with, but it really just takes some getting used to. The softness and sheen are unparalleled, so I find that chenille yarn really elevates the projects I use it on. Plus, if you can’t see your stitches, then neither can anyone else. So if you miss one or add one here and there, you really can’t tell. In this way, chenille yarn can actually be very forgiving!
I’d love to see your versions of the Gingerbread Narwhal Applique – so make sure you tag me if you make one! @nineinspired on IG & Tiktok and @nineinspiredblog on Pinterest and Facebook
Save This Pattern For Later
Purchase an Ad-Free Printable PDF

Materials
- Premier Just Chenille in Brown and White, Premier Parfait Chunky in Red, Super Bulky #6 Weight
- 4 mm hook
- Felt eyes or safety eyes if desired
- Embroidery Needle and/or Hot Glue Gun
Finished Measurements
6 x 4 inches (15 x 10 cm)
Abbreviations
US Terminology
ch = chain
st = stitch
sp = space
sk = skip
sl st = slip stitch
sc = single crochet
hdc = half double crochet
dc = double crochet
Notes
Do not turn unless specifically instructed to do so. The starting chain at the beginning of the round does not count as a stitch. Underlines indicate reference pictures.
Body
With Brown, Magic Circle
Round 1: Ch 2, dc 10 in the magic circle, sl st to join. (10)
Round 2: Ch 2, 2 dc in each st around, sl st to join. (20)
Round 3: Ch 2, *2 dc in the first st, dc in the next st, repeat from * around, sl st to join. (30)
Now we will begin forming the tail
Row 4: ch 1, sc in the first st, hdc in the next st, turn. (2)
Row 5: ch 1, hdc in the first st, sc in the next st, ch 4, turn. (2)
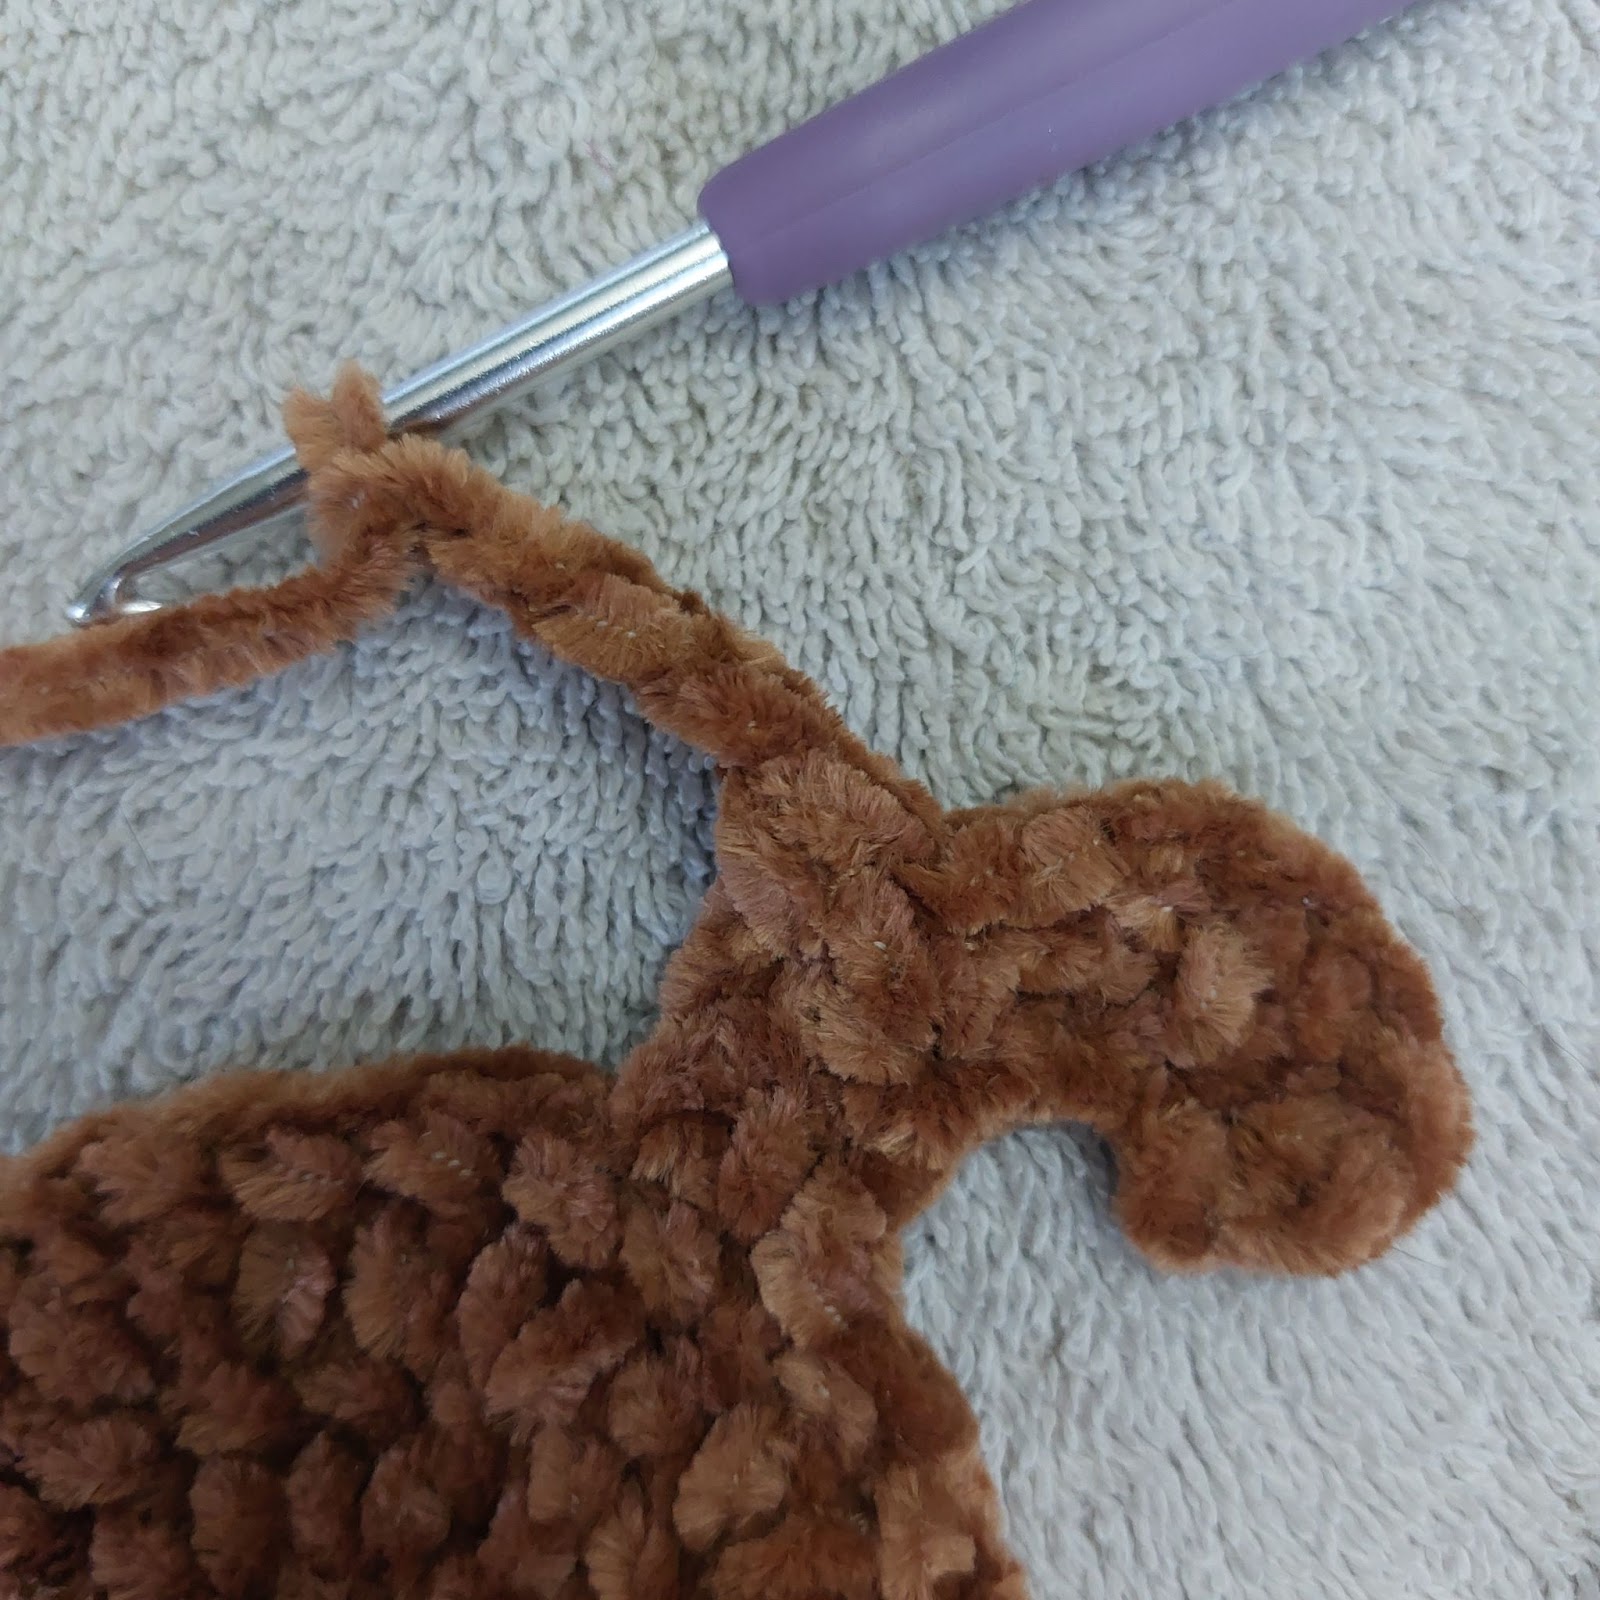
Row 6: sc and hdc in the 2nd ch from the hook, hdc and dc in the next ch, dc and hdc in the next ch, sc in each of the next 2 sts (see 1st picture), ch 4, turn. (8) (see 2nd picture for what it should look like at the end of Row 6)

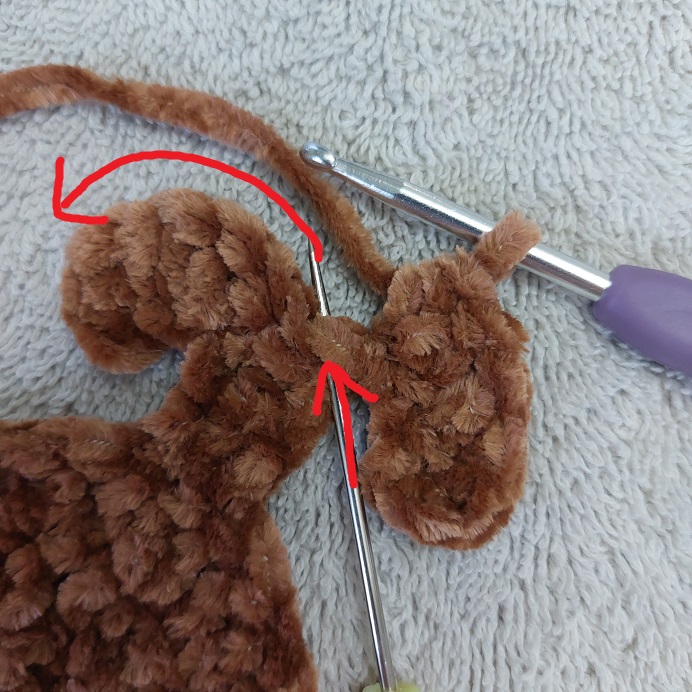
Row 7: sc and hdc in the 2nd ch from the hook, hdc and dc in the next ch, dc and hdc in the next ch, sl st to the next st, continue working in the same direction (see 3rd picture) and sc evenly around the entire piece until you get back to where you started, fasten off and weave in ends.
Fins (Make 2)
With brown, ch 2.
Row 1: hdc in the 2nd ch from the hook, turn.
Row 2: ch 1, hdc 3, fasten off and weave in ends.
Horn
With red, ch 6
Row 1: sl st in the 2nd ch from the hook, sc in the next 2 sts, hdc in the next 2 sts, fasten off and weave in ends.
Icing
With white, ch 4
Round 1: hdc in the 2nd ch from the hook, hdc in the next ch, hdc 3 in the last ch, rotate your work (see 1st picture), hdc in the next ch (see 2nd picture), hdc 2 in the next ch, sl st to join. (see 3rd picture for end result)


Round 2: ch 1, sc in the first st, ch 4, sl st to the 2nd ch from the hook and the next 2 chs, sc in the first st again, hdc in the next 2 sts, ch 2, sl st to the 2nd ch from the hook, hdc again in the last st you worked into, sc in the next 2 sts, ch 3, sl st to the 2nd ch from the hook and the next ch, sc again in the last st you worked into, sc in the next st, leave remaining sts unworked, fasten off and weave in ends. (see picture for end result)

Finishing
Sew or glue the fins, icing, and horn onto the body. Glue on felt eyes, attach safety eyes, or embroider them. Embroider or fabric paint on the details: a little smile, 2 pink ovals for the cheeks, white diagonal lines on the horn, and white zig zag lines near the edges of the fins and tail.
___________________________________________
Copyright © 2022 Nine Inspired. All rights reserved. Please do not redistribute this pattern as your own, but feel free to sell finished items made from this pattern. I would appreciate it if you would credit Nine Inspired as the designer.